Disclosure: This post contains affiliate links. I may earn a commission at no extra cost to you if you make a purchase through these links. This helps keep the site running and allows me to continue providing free, in-depth guides.
How to Start a Niche Blog for Passive Income (Step-by-Step)
Most new bloggers fail within the first year because they treat their website like a personal diary. They write about their daily life, their random thoughts, and their varied hobbies, only to realize six months later that nobody is reading it and they haven’t made a single dollar.
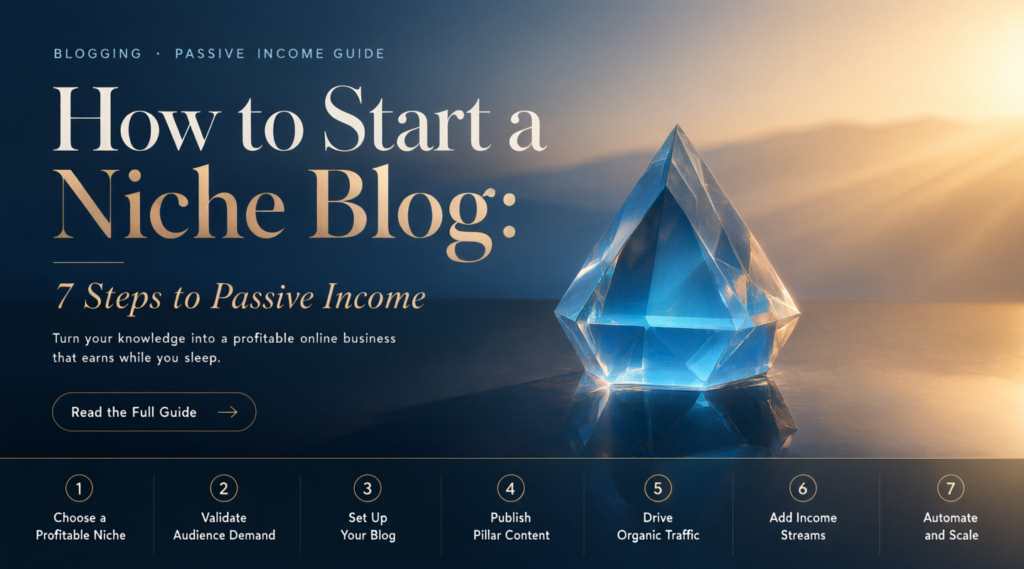
If you want to build a real digital asset that generates passive income, you need to start a niche blog. A niche blog focuses on one specific topic, solves a specific set of problems, and attracts a highly targeted audience that is actually looking to buy solutions.
This guide will walk you through exactly how to start a niche blog from scratch, validate your idea for profitability, and set up your site to generate revenue. No fluff, no generic advice—just the exact blueprint used by successful affiliate marketers and digital entrepreneurs.
Prefer watching? Check out our complete video walkthrough:
What Is a Niche Blog (And Why It Beats a Lifestyle Blog)?
A niche blog is a website dedicated to a specific, narrowly defined topic. Instead of a “lifestyle blog” that covers travel, food, fashion, and home decor all on one site, a niche blog might focus exclusively on “vegan meal prep for busy professionals” or “budget travel in Southeast Asia.”
The primary reason niche blogs outperform lifestyle blogs in the current search engine landscape is topical authority. Search engines like Google want to rank websites that are recognized as experts in a specific field. When you write 50 highly detailed articles about indoor hydroponic gardening, search engines trust your site more for that topic than a general lifestyle site that has one post about gardening, one about dog training, and one about baking. You can read more about how search engines evaluate expertise in Google’s official Search Quality Evaluator Guidelines.
Furthermore, a niche audience is much easier to monetize. If you write about “general fitness,” your audience is too broad to target with specific affiliate products. If you write about “kettlebell training for seniors,” you know exactly what equipment, supplements, and online courses your readers need, making your affiliate marketing efforts highly targeted and lucrative.
What You Need Before You Start
Before we dive into the steps, let’s set realistic expectations for the tools, budget, and mindset you need.
The Budget:
You do not need to spend thousands of dollars to start. Here is a realistic breakdown for the first year:
- Domain Name: ~$10–$15/year
- Web Hosting: ~$35–$60 for the first year (using introductory promo rates)
- Premium Theme (Optional): $0–$60 (You can start with a free theme like Astra or GeneratePress)
- Keyword Research Tool: $0–$100/year (Free tools exist, but a paid tool saves hundreds of hours)
- Total Year 1 Cost: ~$50 to $200.
The Mindset:
Blogging is not a get-rich-quick scheme. It is a compounding asset. You will likely work for 3 to 6 months before seeing significant organic traffic. You need the patience to publish consistently without seeing immediate financial returns. If you are looking for a next-week payday, this isn’t it. If you want to build an income stream that pays you for years, keep reading.
Step 1: Find a Profitable Niche (The 3-Layer Validation)
The biggest mistake beginners make is picking a niche based solely on passion. Passion is important for stamina, but it doesn’t pay the bills. To find a profitable niche, run your ideas through this 3-Layer Validation framework:
Layer 1: Audience Pain Points (Is there a problem to solve?)
Your niche must solve a problem or fulfill a deep desire. People search for solutions to problems. “My dog pulls on the leash” is a problem. “History of dog breeds” is just trivia. Trivia doesn’t sell products; solutions do.
Layer 2: Monetization Potential (Are people spending money?)
You need to verify that there are products or services you can promote. Look at Amazon for physical products, check for affiliate programs in your space, and see if people are buying courses or software.
Illustrative Example: A blog about “free mobile games” has massive traffic potential but terrible monetization (low ad RPMs, few high-ticket affiliates). A blog about “home golf simulator setups” has lower traffic potential, but high-ticket affiliate commissions on $2,000+ simulators. The latter is often more profitable for a beginner.
Layer 3: Competition Check (Can you actually rank?)
If you search your niche ideas and see only massive authority sites (like Forbes, NerdWallet, or Healthline) on page one, the niche is too broad. You want to find a “sub-niche” where you can see smaller, independent blogs ranking on page one.
Action Step: Pick 3 ideas. Run them through these 3 layers. Narrow it down to one specific sub-niche.
Step 2: Research Your Target Audience and Keywords
Once you have your niche, you need to know exactly what your audience is typing into search engines. This is where keyword research comes in. You aren’t guessing what to write about; you are letting search data dictate your content.
You need to find two types of keywords:
- Informational Keywords: “How to clean a coffee maker,” “best running shoes for flat feet.” These bring in traffic.
- Commercial/Transactional Keywords: “Best espresso machines under $500,” “Nike Pegasus vs. Brooks Ghost.” These bring in buyers.
To find these, use a keyword research tool. If you want to skip the manual digging and use a tool that highlights low-competition keywords specifically for new blogs, [keysearch] is a highly cost-effective option for beginners. It allows you to filter by low keyword difficulty (KD) and shows you exactly who is currently ranking for a term so you can gauge the competition.

Find Keywords That Actually Rank
Stop guessing what to write. KeySearch helps you discover low-competition keywords, analyze competitors, and create SEO content that drives long-term organic traffic.
How to build your initial list:
- Type your main niche into the tool and look for keywords with a search volume of 100 to 1,000 per month.
- Filter for low competition (KD score under 20-30).
- Look at the “People Also Ask” and “Related Searches” sections at the bottom of Google search results for your main topic.
- Group these keywords into “content clusters.” For example, if your niche is indoor gardening, one cluster is “lighting,” another is “soil mixes,” and another is “pest control.”
Aim to generate a list of 30 to 50 article ideas before you even build your website. This ensures you never run out of things to write about. If you need more help brainstorming topics and validating your niche, check out our guide on The Best Business Ideas for 2025: Find Your Niche.
Step 3: Choose a Domain Name and Hosting Provider
Your domain name is your address on the internet. Keep it simple, memorable, and relevant to your niche.
Domain Name Rules:
- Stick to .com: It’s still the most trusted extension.
- Keep it short: Ideally under 15 characters.
- Avoid hyphens and numbers: They cause confusion when spoken aloud.
- Include your niche (optional but helpful): If your niche is “vegan baking,” a domain like VeganBakingMastery.com tells both users and search engines exactly what your site is about. However, a brandable name like PlantBasedWhisk.com works just as well if you prefer it.
Choosing a Hosting Provider:
Do not use free hosting platforms like Blogger or Wix if you are serious about making money. You need full control over your site, which means using self-hosted WordPress.
For beginners, you want hosting that is affordable, fast, and offers easy WordPress installation. [hostinger] is a great starting point because it offers excellent introductory pricing, includes a free domain for the first year, and has a very intuitive custom control panel that makes installing WordPress a one-click process.
Action Step: Purchase your domain and hosting, and use your host’s dashboard to install WordPress. It literally takes about 5 minutes.
Launch Your Website Today—Without Breaking the Bank
Get fast, secure, and beginner-friendly hosting with Hostinger. Set up your website in minutes and start building your online business today.
Step 4: Set Up WordPress and Install Essential Plugins
Once WordPress is installed, log into your dashboard (yourdomain.com/wp-admin). Before you write a single word, you need to configure your site for speed, security, and SEO.
1. Choose a Lightweight Theme
Avoid bloated, heavy themes packed with unnecessary animations. Go to Appearance > Themes and install a lightweight, fast theme like Astra, GeneratePress, or Kadence. They have free versions that are more than enough to get started and won’t drag down your page load speeds.
2. Install Essential Plugins
Plugins add functionality to your site. Go to Plugins > Add New and install these core plugins:
- SEO: RankMath or Yoast SEO. (RankMath’s free version is incredibly robust). This helps you optimize your on-page SEO.
- Caching/Speed: WP Super Cache or LiteSpeed Cache (if your host supports it). Speed is a direct ranking factor.
- Security: Wordfence or Solid Security. Protects your site from brute force attacks.
- Backups: UpdraftPlus. Never rely solely on your host for backups. This plugin lets you back up your site directly to Google Drive or Dropbox.
- Image Optimization: ShortPixel or Smush. Compresses images automatically so they don’t slow down your pages.
3. Basic Settings
Go to Settings > Permalinks and change your URL structure to “Post name.” This ensures your URLs look like yoursite.com/best-coffee-makers instead of yoursite.com/?p=123. Clean URLs are better for SEO and user experience.
![Alt: WordPress dashboard showing the Permalinks settings set to ‘Post name’ for clean URL structures]
Step 5: Create a Content Strategy and Publish Your First 5 Posts
Now it’s time to write. But don’t just write randomly. Use the Hub and Spoke content model.
Your “Hub” is a comprehensive, pillar page (e.g., “The Ultimate Guide to Indoor Hydroponics”). Your “Spokes” are smaller, highly specific articles that link back to the Hub (e.g., “Best LED Grow Lights for Beginners,” “How to Mix Nutrients for Hydroponic Tomatoes”). This internal linking structure passes link equity around your site and signals to search engines that you are an authority on the broader topic.
Anatomy of a Perfect Blog Post:
- The Hook (Intro): Address the reader’s problem immediately. Tell them exactly what they will learn. Keep it under 150 words.
- The Meat (H2s and H3s): Break the content into scannable sections. Use short paragraphs (2-4 sentences).
- E-E-A-T Signals: Include personal anecdotes, original photos, or specific data. Show, don’t just tell. If you are reviewing a product, show a picture of it in your actual home. According to recent data from Authority Hacker, sites that include original imagery and first-hand experience see a 30% higher conversion rate on affiliate links.
- The Conclusion: Summarize the main points and tell the reader what to do next (e.g., leave a comment, check out a related post).
Your First 5 Posts:
Don’t launch your site with just one post. It looks abandoned. Write and publish your first 5 articles before you announce your blog to the world. Aim for 1,500 to 2,000 words per post. Focus on answering the user’s query better and more thoroughly than the current page-one results.
Step 6: Set Up Your Monetization Strategy from Day One
You don’t need 10,000 visitors a month to start making money, but you do need to set up the infrastructure early. Here are the three primary ways to monetize a niche blog, ranked from easiest to most profitable.
1. Affiliate Marketing (The Bread and Butter)
You recommend products and earn a commission when readers buy through your links.
- Amazon Associates: Great for physical products, but commission rates are low (1-4%) and cookies last only 24 hours.
- Niche Affiliate Programs: Look for private affiliate programs in your niche (often found by searching “[Your Niche] + affiliate program”). These often pay 20-30% commissions and have 30-to-90-day cookies.
Tip: Always disclose your affiliate links. It builds trust and keeps you legally compliant. For a deeper dive into this, check out our guide on 10 Proven Strategies for Success with Amazon Affiliate Marketing Programs.
2. Display Advertising
Once you hit a certain traffic threshold (usually 10,000 to 50,000 sessions per month), you can apply to premium ad networks like Mediavine or Raptive (formerly AdThrive). They place ads on your site and pay you based on RPM (revenue per mille, or per 1,000 sessions). In lucrative niches like finance or tech, RPMs can range from $15 to $30+. Before that, you can use Ezoic or Google AdSense, though the pay is significantly lower.
3. Digital Products and Services (and Email Marketing)
Once you understand your audience’s pain points, create a solution. This could be a $15 eBook, a $50 video course, or even $100/hour consulting calls. This is the most profitable method because you keep 100% of the revenue and own the customer relationship.
To sell digital products effectively, you need to capture your readers’ emails before they leave your site. Offering a free “cheat sheet” or “checklist” in exchange for an email address is the standard playbook. To capture these leads, you need an email marketing platform. [convertkit] (now Kit) is built specifically for creators and makes setting up automated lead magnet delivery incredibly simple, allowing you to nurture subscribers and sell your digital products on autopilot.
![Alt: Graph showing the compounding income potential of affiliate marketing versus display ads over a 24-month period]
How Much Can You Realistically Make?
Let’s strip away the “make $10k in your first month” hype. Blogging income is non-linear. Here is a realistic timeline for a well-executed niche blog:
- Months 1–3: $0. You are in the “sandbox” period. Google is testing your site. You are publishing content and building a foundation.
- Months 4–6: $50–$200/month. Traffic starts to trickle in. You make your first few affiliate sales. You might get accepted into a few affiliate programs.
- Months 7–12: $500–$2,000/month. The compounding effect kicks in. Older posts gain traction. You start ranking for higher-volume keywords.
- Year 2 and Beyond: $2,000–$10,000+/month. At this stage, you have a massive backlog of content. You can introduce display ads and digital products, which drastically increases your revenue per visitor.
Note: These numbers assume you are publishing 2-4 high-quality, SEO-optimized articles per week and targeting keywords with actual commercial intent. Results vary based on niche, competition, and execution.
Common Mistakes Beginners Make When Starting a Niche Blog
Avoid these pitfalls to save yourself months of frustration:
1. Changing Niches Too Early
At month four, when traffic is still low, you might think, “This niche isn’t working,” and pivot to a new one. Don’t. It takes 6 to 12 months for a new domain to gain topical authority. If you pivot, you reset the clock to zero. Stick to your niche for at least a year.
2. Writing Only for Yourself
If you aren’t doing keyword research, you are just writing diary entries. Every post should be targeted at a specific search query. If nobody is searching for the topic, nobody will read it.
3. Ignoring On-Page SEO
Writing a great article isn’t enough; you need to tell search engines what it’s about. Use your target keyword in the URL, the H1, the first 100 words, and naturally throughout the text. Use an SEO plugin to guide you.
4. Focusing on Design Over Content
Spend 10% of your time tweaking your logo and site colors, and 90% of your time writing and promoting content. Ugly sites that rank #1 make money. Beautiful sites with no content make nothing.
Conclusion
Starting a niche blog is one of the most reliable ways to build a passive income stream, but it requires treating it like a real business from day one. By choosing a profitable sub-niche, validating your ideas with keyword research, and consistently publishing highly targeted content, you can build an asset that pays you for years to come.
Your next step is simple: pick your niche, run it through the 3-Layer Validation framework, and buy your domain name. Don’t overthink the setup; just get the site live and start writing.
If you need help finding the right tools to speed up your keyword research and site setup, check out the recommended tools linked above. Now, go pick your niche and start building.